Browse with no account
Explore is public — anyone can browse the store and open an app’s page without signing in. They see what it is before deciding to use it.
This is the end-to-end walkthrough: build a mini app, test it against your real data, and publish it to the public Explore app store so other people can run it — and, if you let them, fork it into their own account.
You’ll see both ways to build one — by asking the assistant, and by putting a UI on workflows you already have — and exactly what publishing exposes (and what it keeps private).
You never start from a blank canvas. There are two routes to a working app; pick whichever fits where you’re starting from.
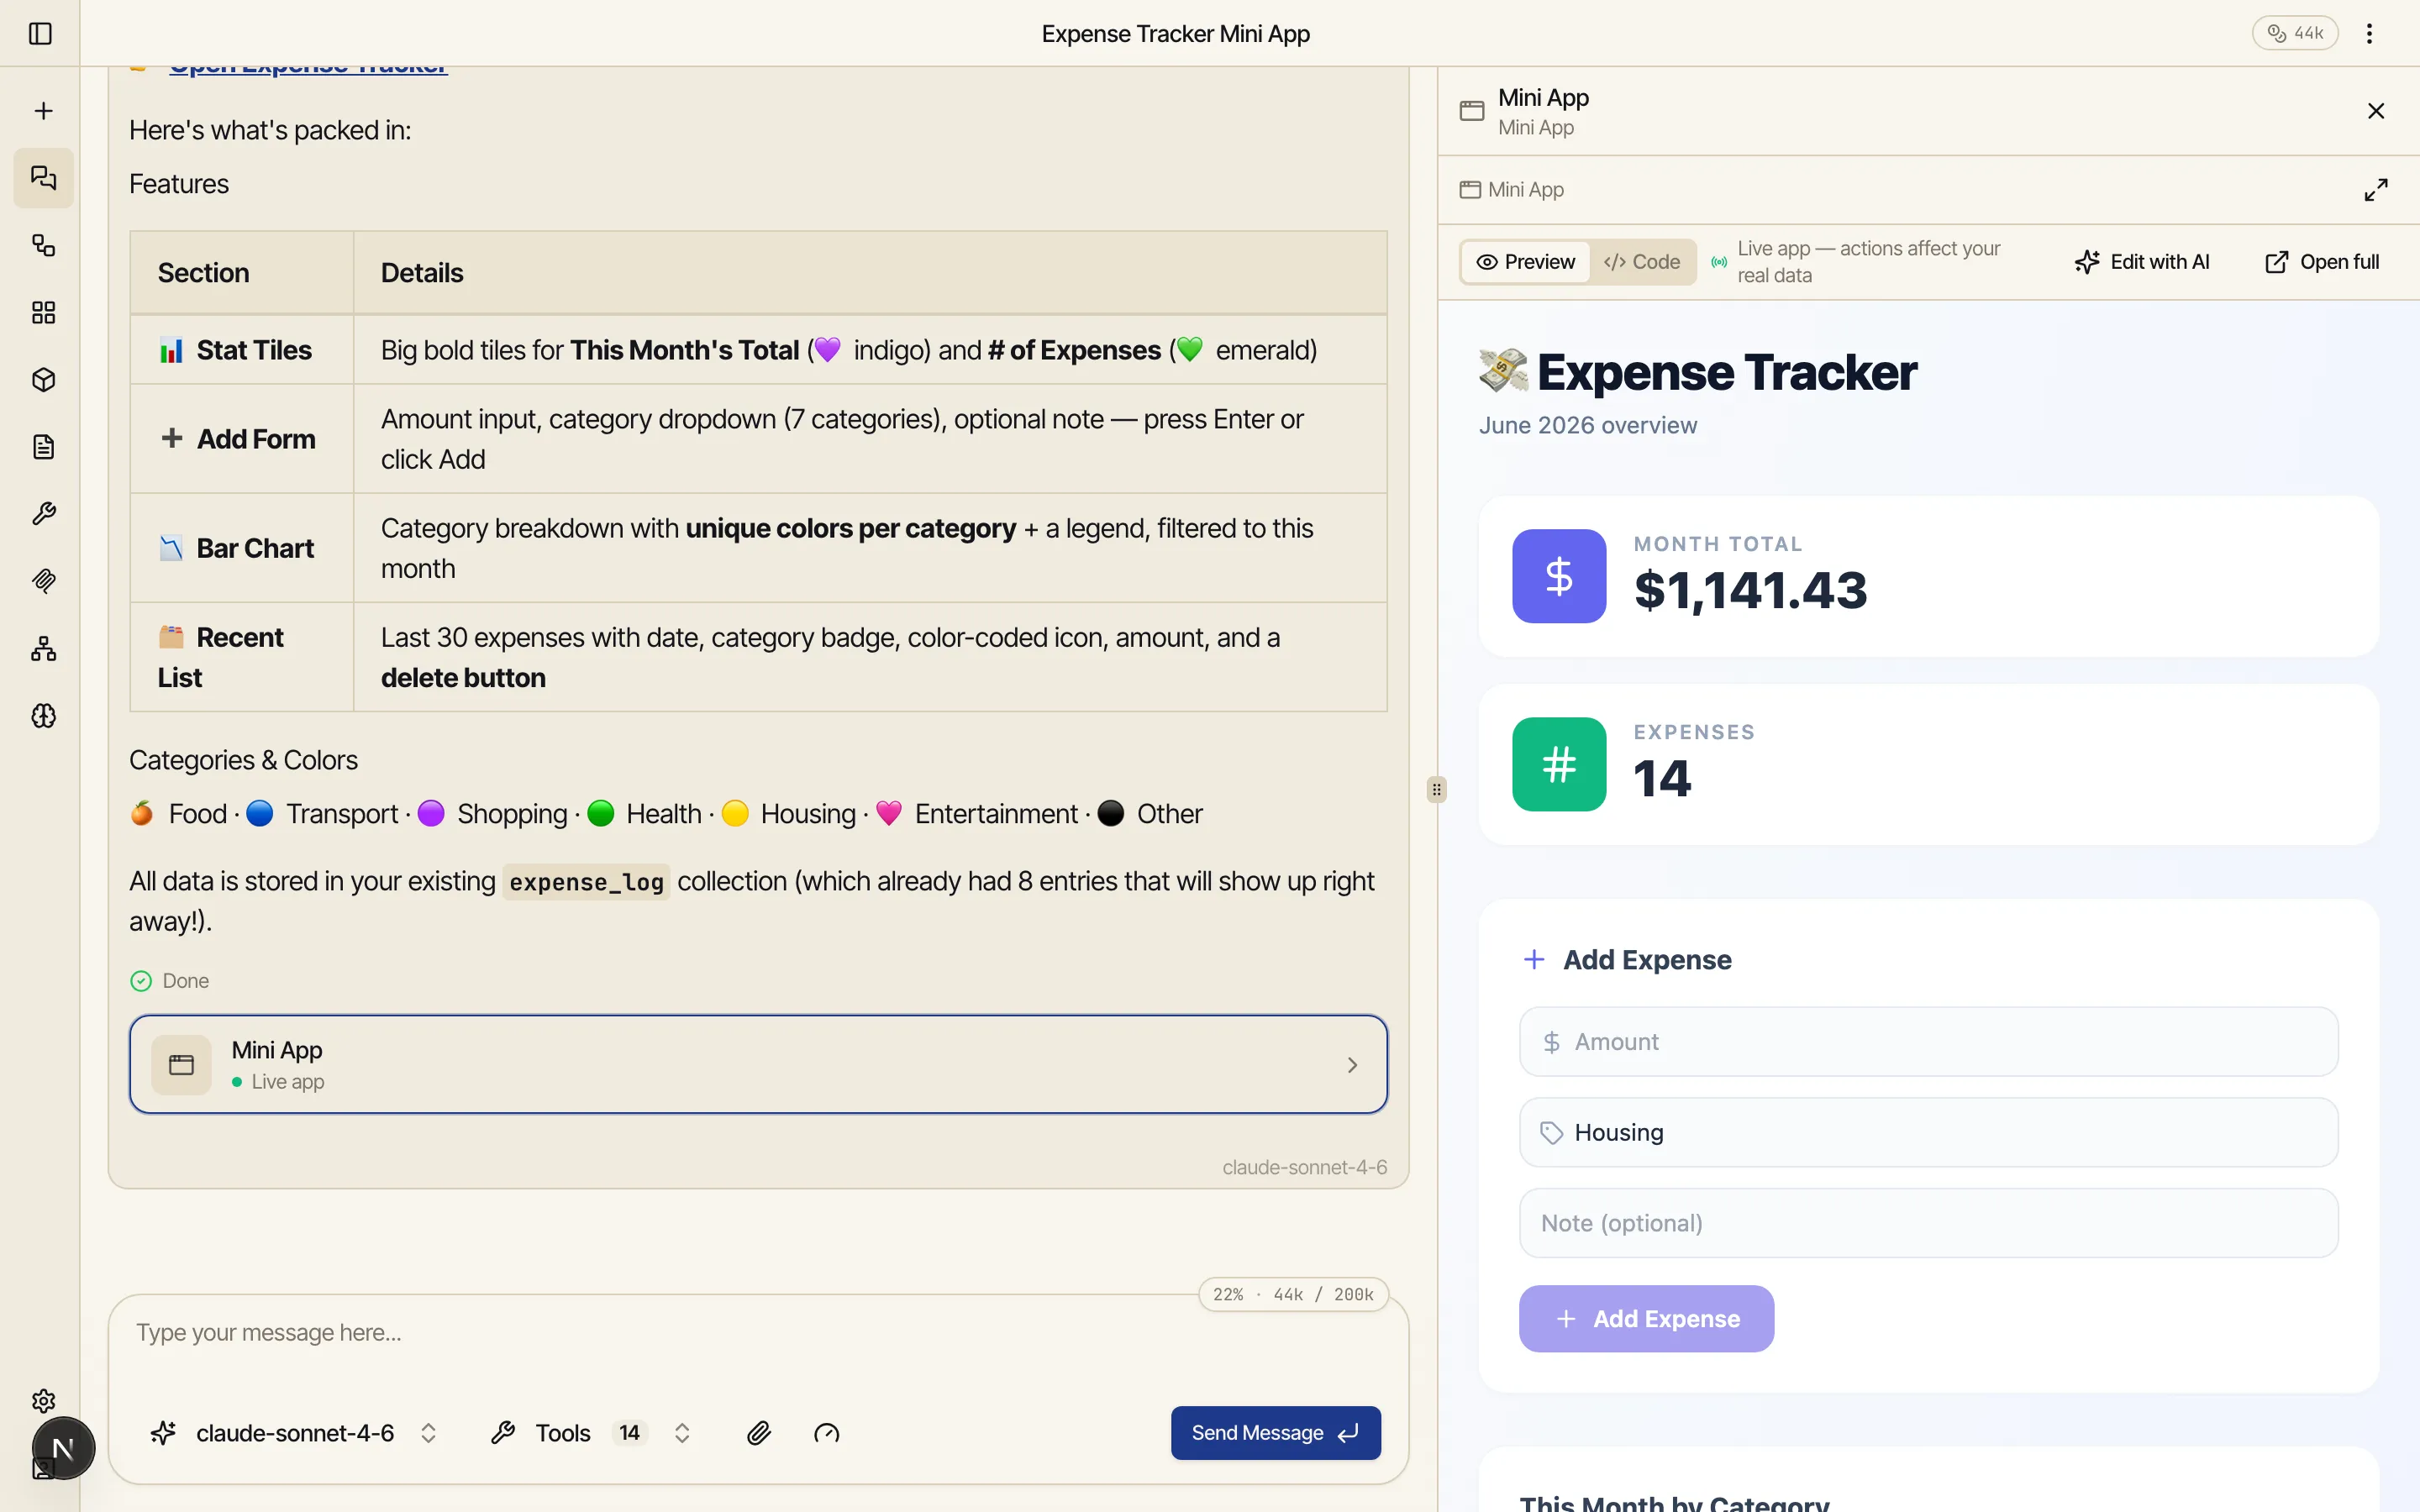
The fastest path: describe what you want in chat and the assistant builds any workflows it needs, writes the app, and opens it as a live preview right next to the conversation.
Describe the app in any chat. Be concrete about what it does and what you want to see:
Build me an expense tracker that logs spending by category and shows my monthly total.
The assistant builds it. It creates a collection for the data, builds the workflow that does the logging, writes the app, and opens it live in a side panel. If it needs a place to store your entries, it creates that too — nothing to set up first.
Keep talking to change it — “add a category bar chart,” “show this month,” — and the preview reloads to the new version in place.
This is the path most people use. The full chat flow — the live preview, the mini app chip, and iterating by asking — is covered in Build a mini app.
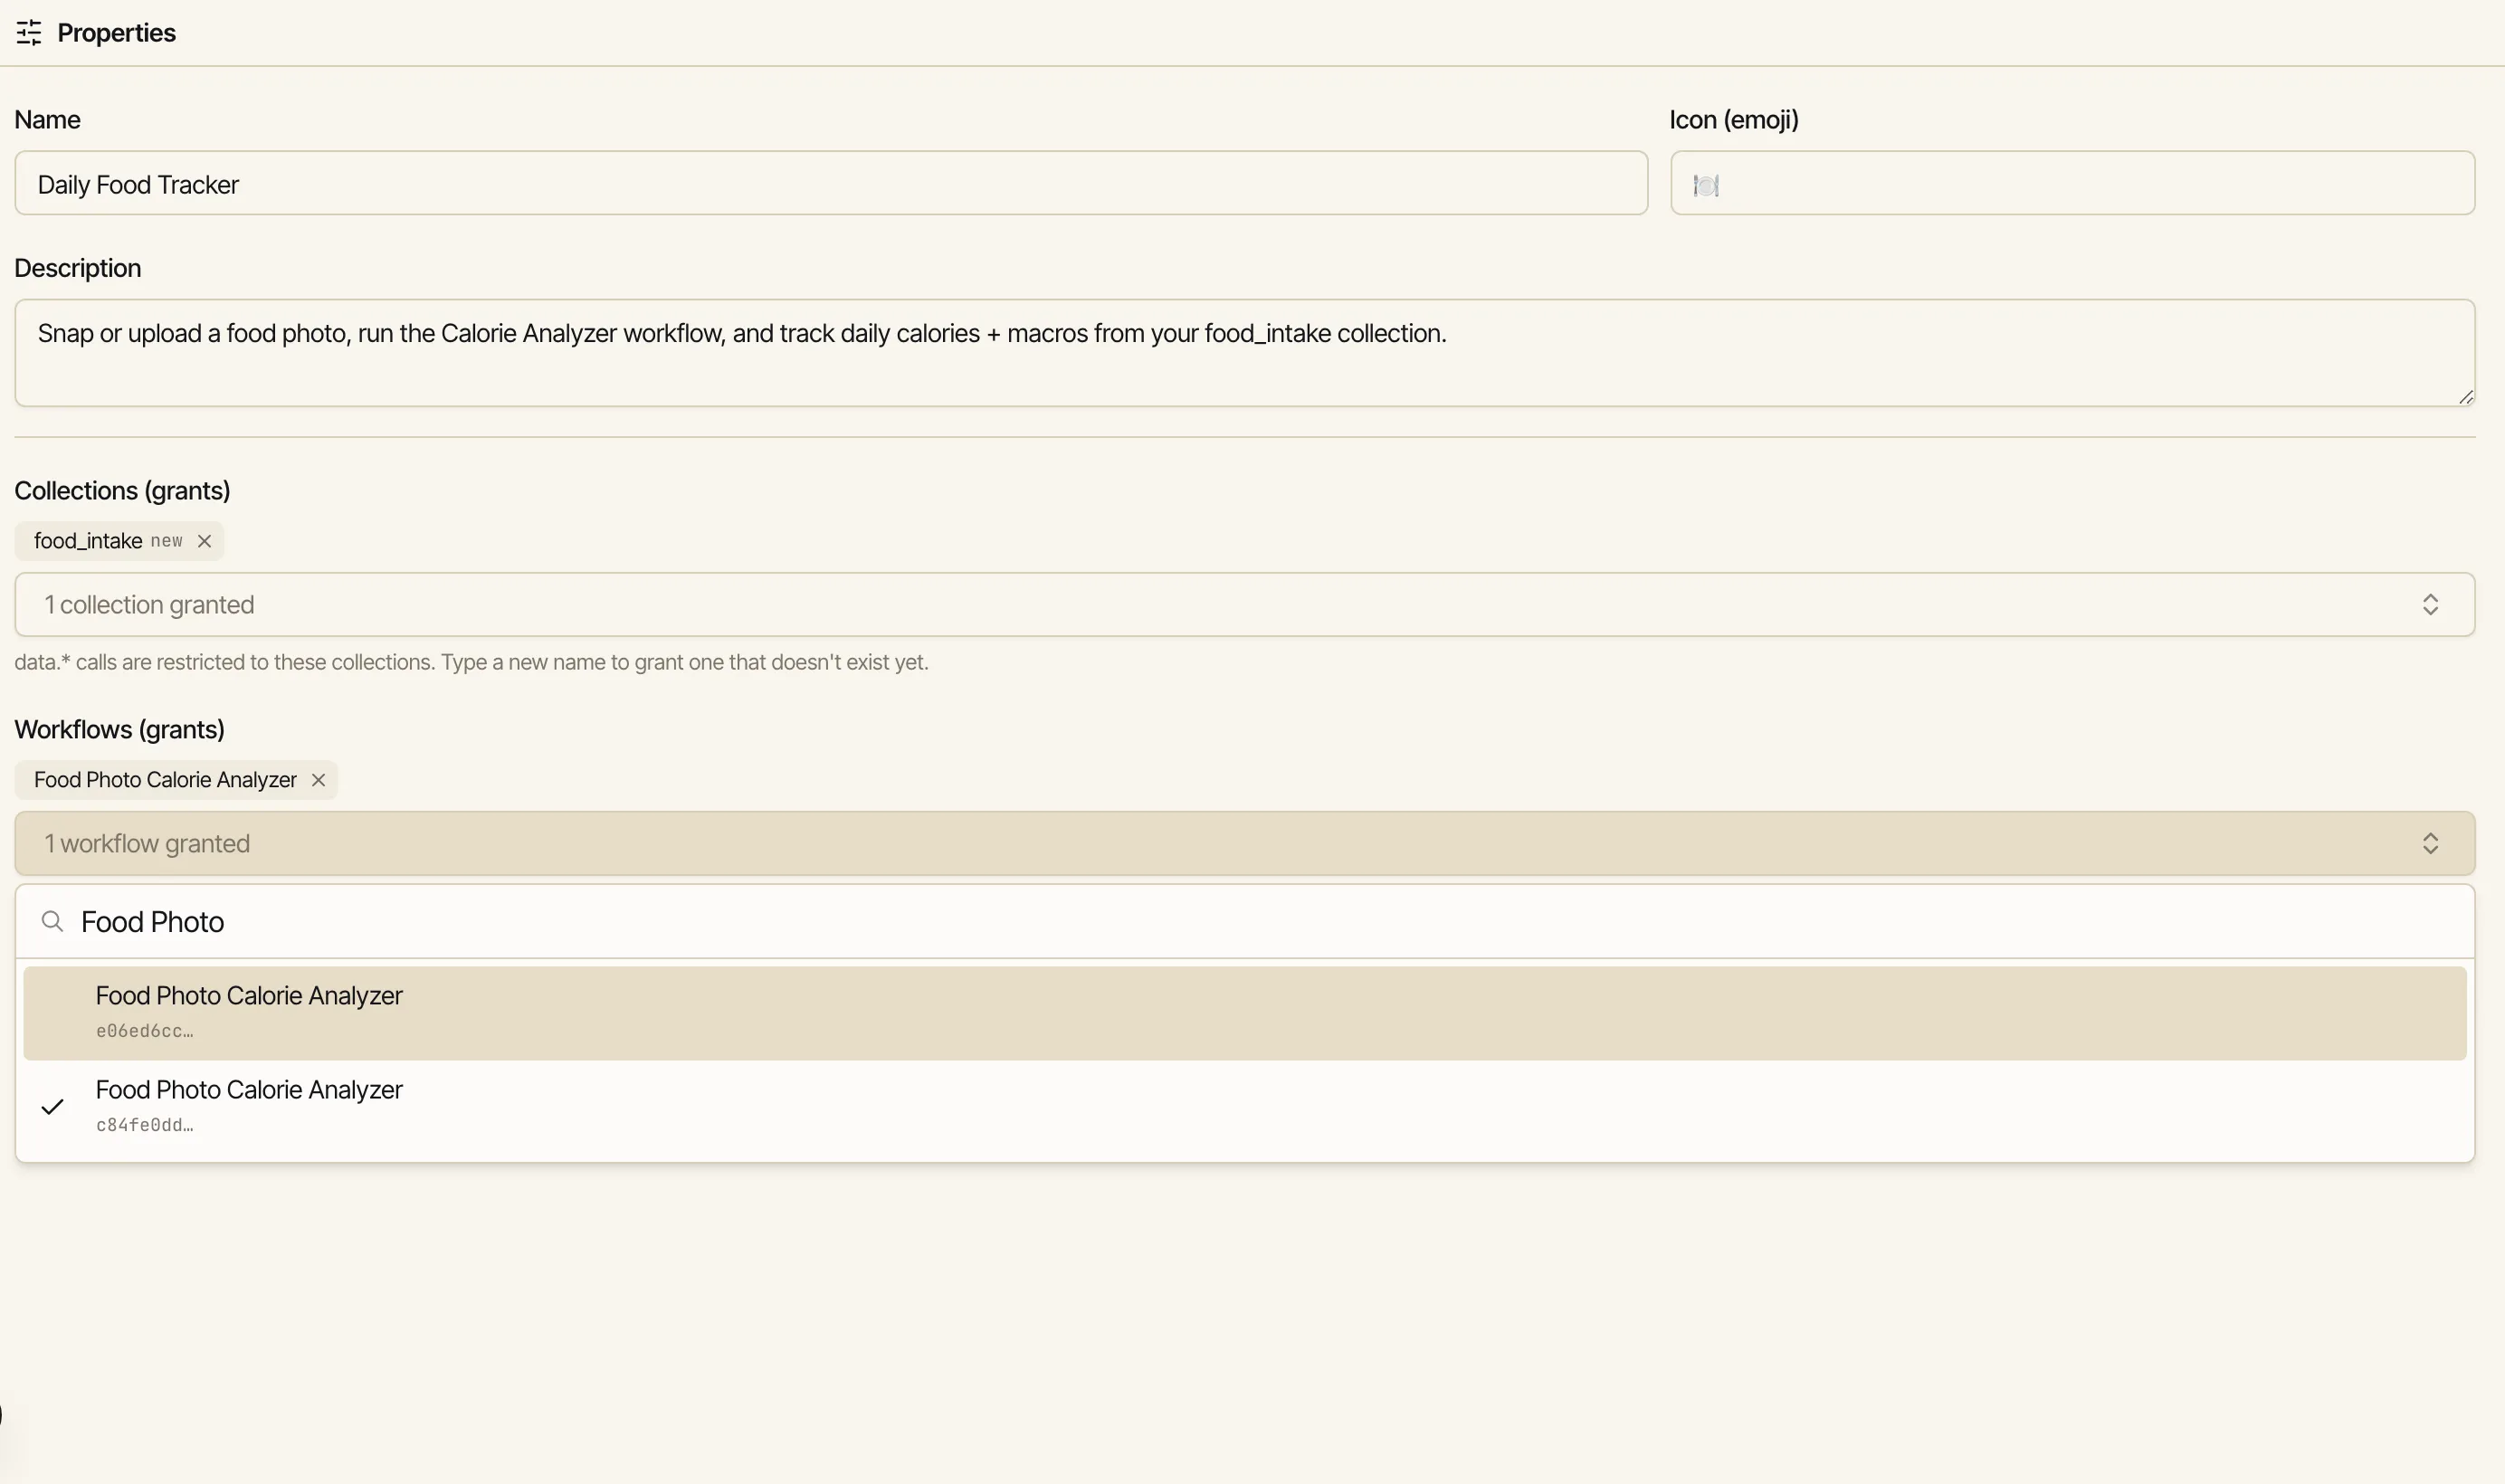
If you’ve already built workflows — and maybe a collection they read and write — an app is just a friendly UI over them. You point the app at the specific workflows and collections it’s allowed to use, and the app calls them for you.
Open the editor. From the Apps section, click New App for a blank app, or Edit on an existing one. You land in the three-pane editor — Code, live Preview, and Properties. (See Editing apps for the full tour.)
Grant the app its workflows and collections. In the Properties pane, add the workflows the app may run and the collections it may read and write — each one by name, picked from things you already own. The app can only touch what’s on these two lists; nothing else in your account is visible to it.
Wire the UI to them in Code. The app talks to its grants through a small built-in bridge — it
runs a granted workflow with catalyst.workflows.run(...) and reads or writes a granted collection
with catalyst.data.query(...), catalyst.data.insert(...), and the rest. It never sees your
login, your API keys, or your provider connections — only the grants.
Or just describe it. You don’t have to hand-write the wiring. Open the Assistant tab in the
editor and say “build a dashboard over my expense_log collection and my monthly_report
workflow” — it writes the Code against the grants for you.
The Preview isn’t a mockup — it’s the real app running against your real data. A button you click really runs the workflow behind it; an entry you add really gets written to your collection.
Try it on the spot: add an expense (or whatever your app does) and watch the numbers and charts update to match. If something breaks, the Preview’s Console catches the error and a Send to assistant button hands it straight to the editor’s Assistant to fix — you don’t have to open browser dev tools. See Editing apps.
Click Save when it’s right. Save keeps you in the editor with the live Preview already reflecting what you saved — it’s “save and keep working,” not “save and leave.”
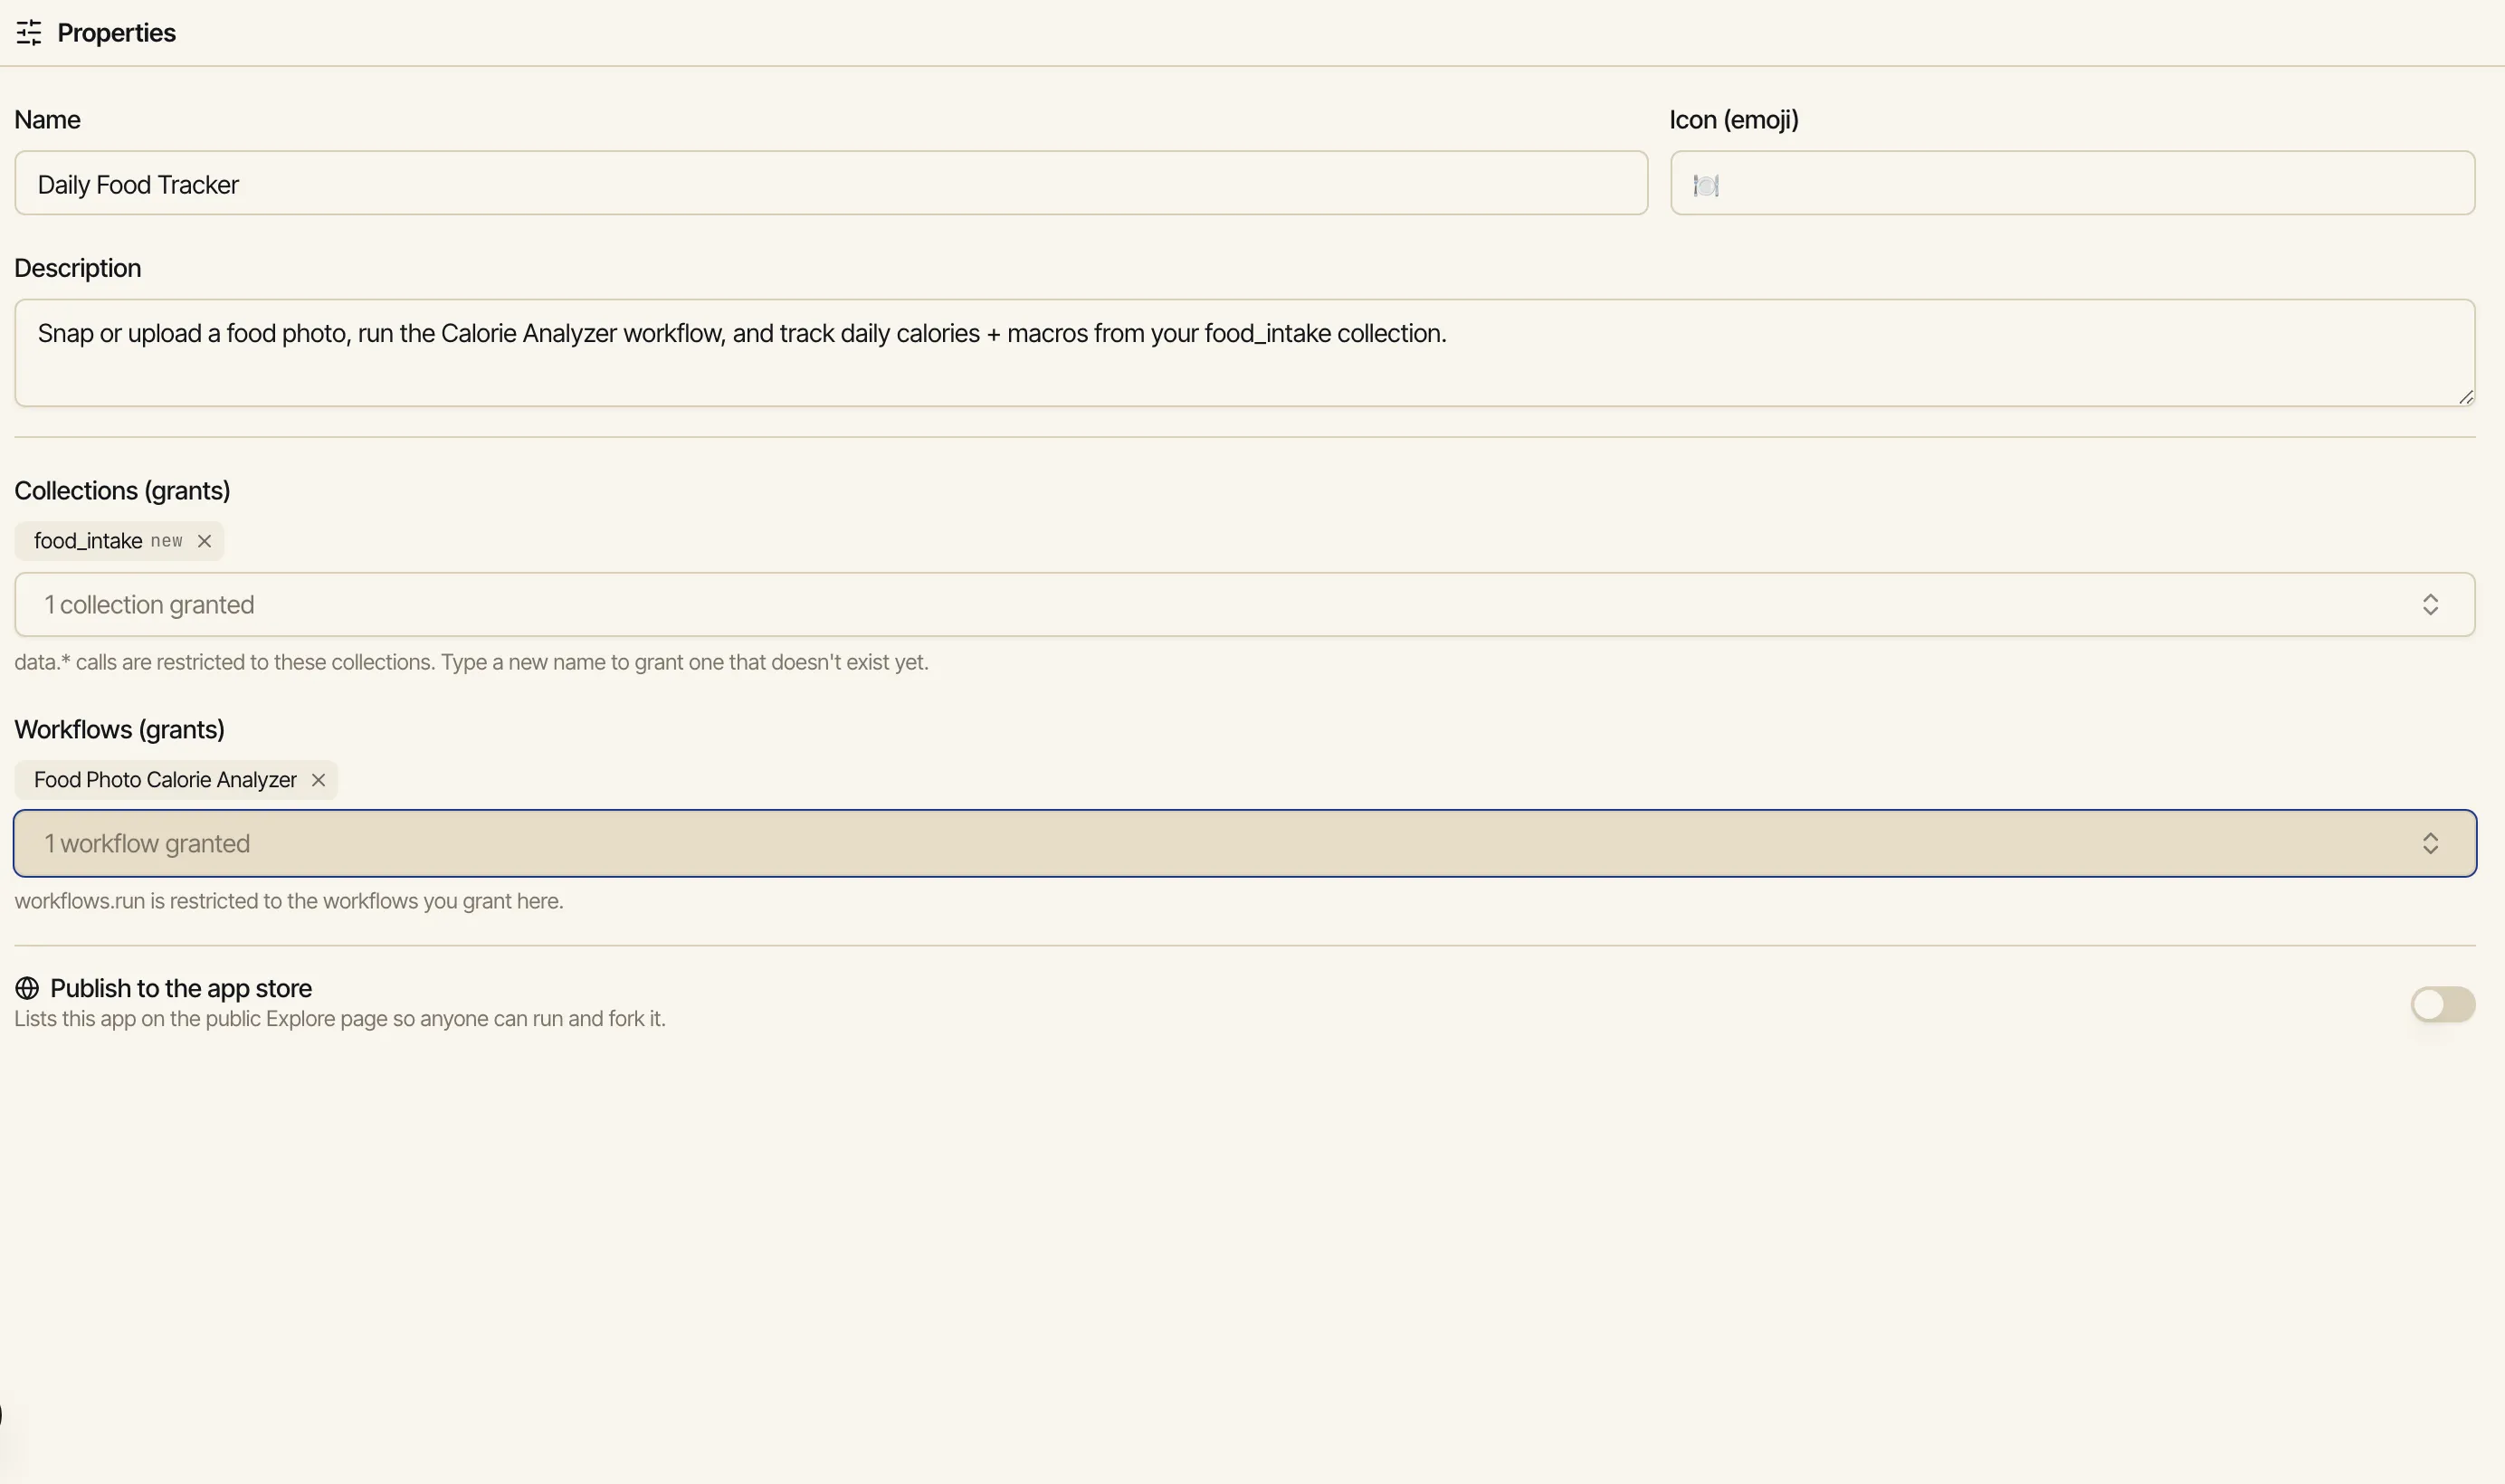
Publishing lives in one place: the editor’s Properties pane. There is no Publish button on the app’s own page — flip the toggle here and the app lists on the public Explore store.
Open Properties in the editor and find Publish to the app store near the bottom. Flipping it on lists the app on the public Explore page so anyone can run and fork it.
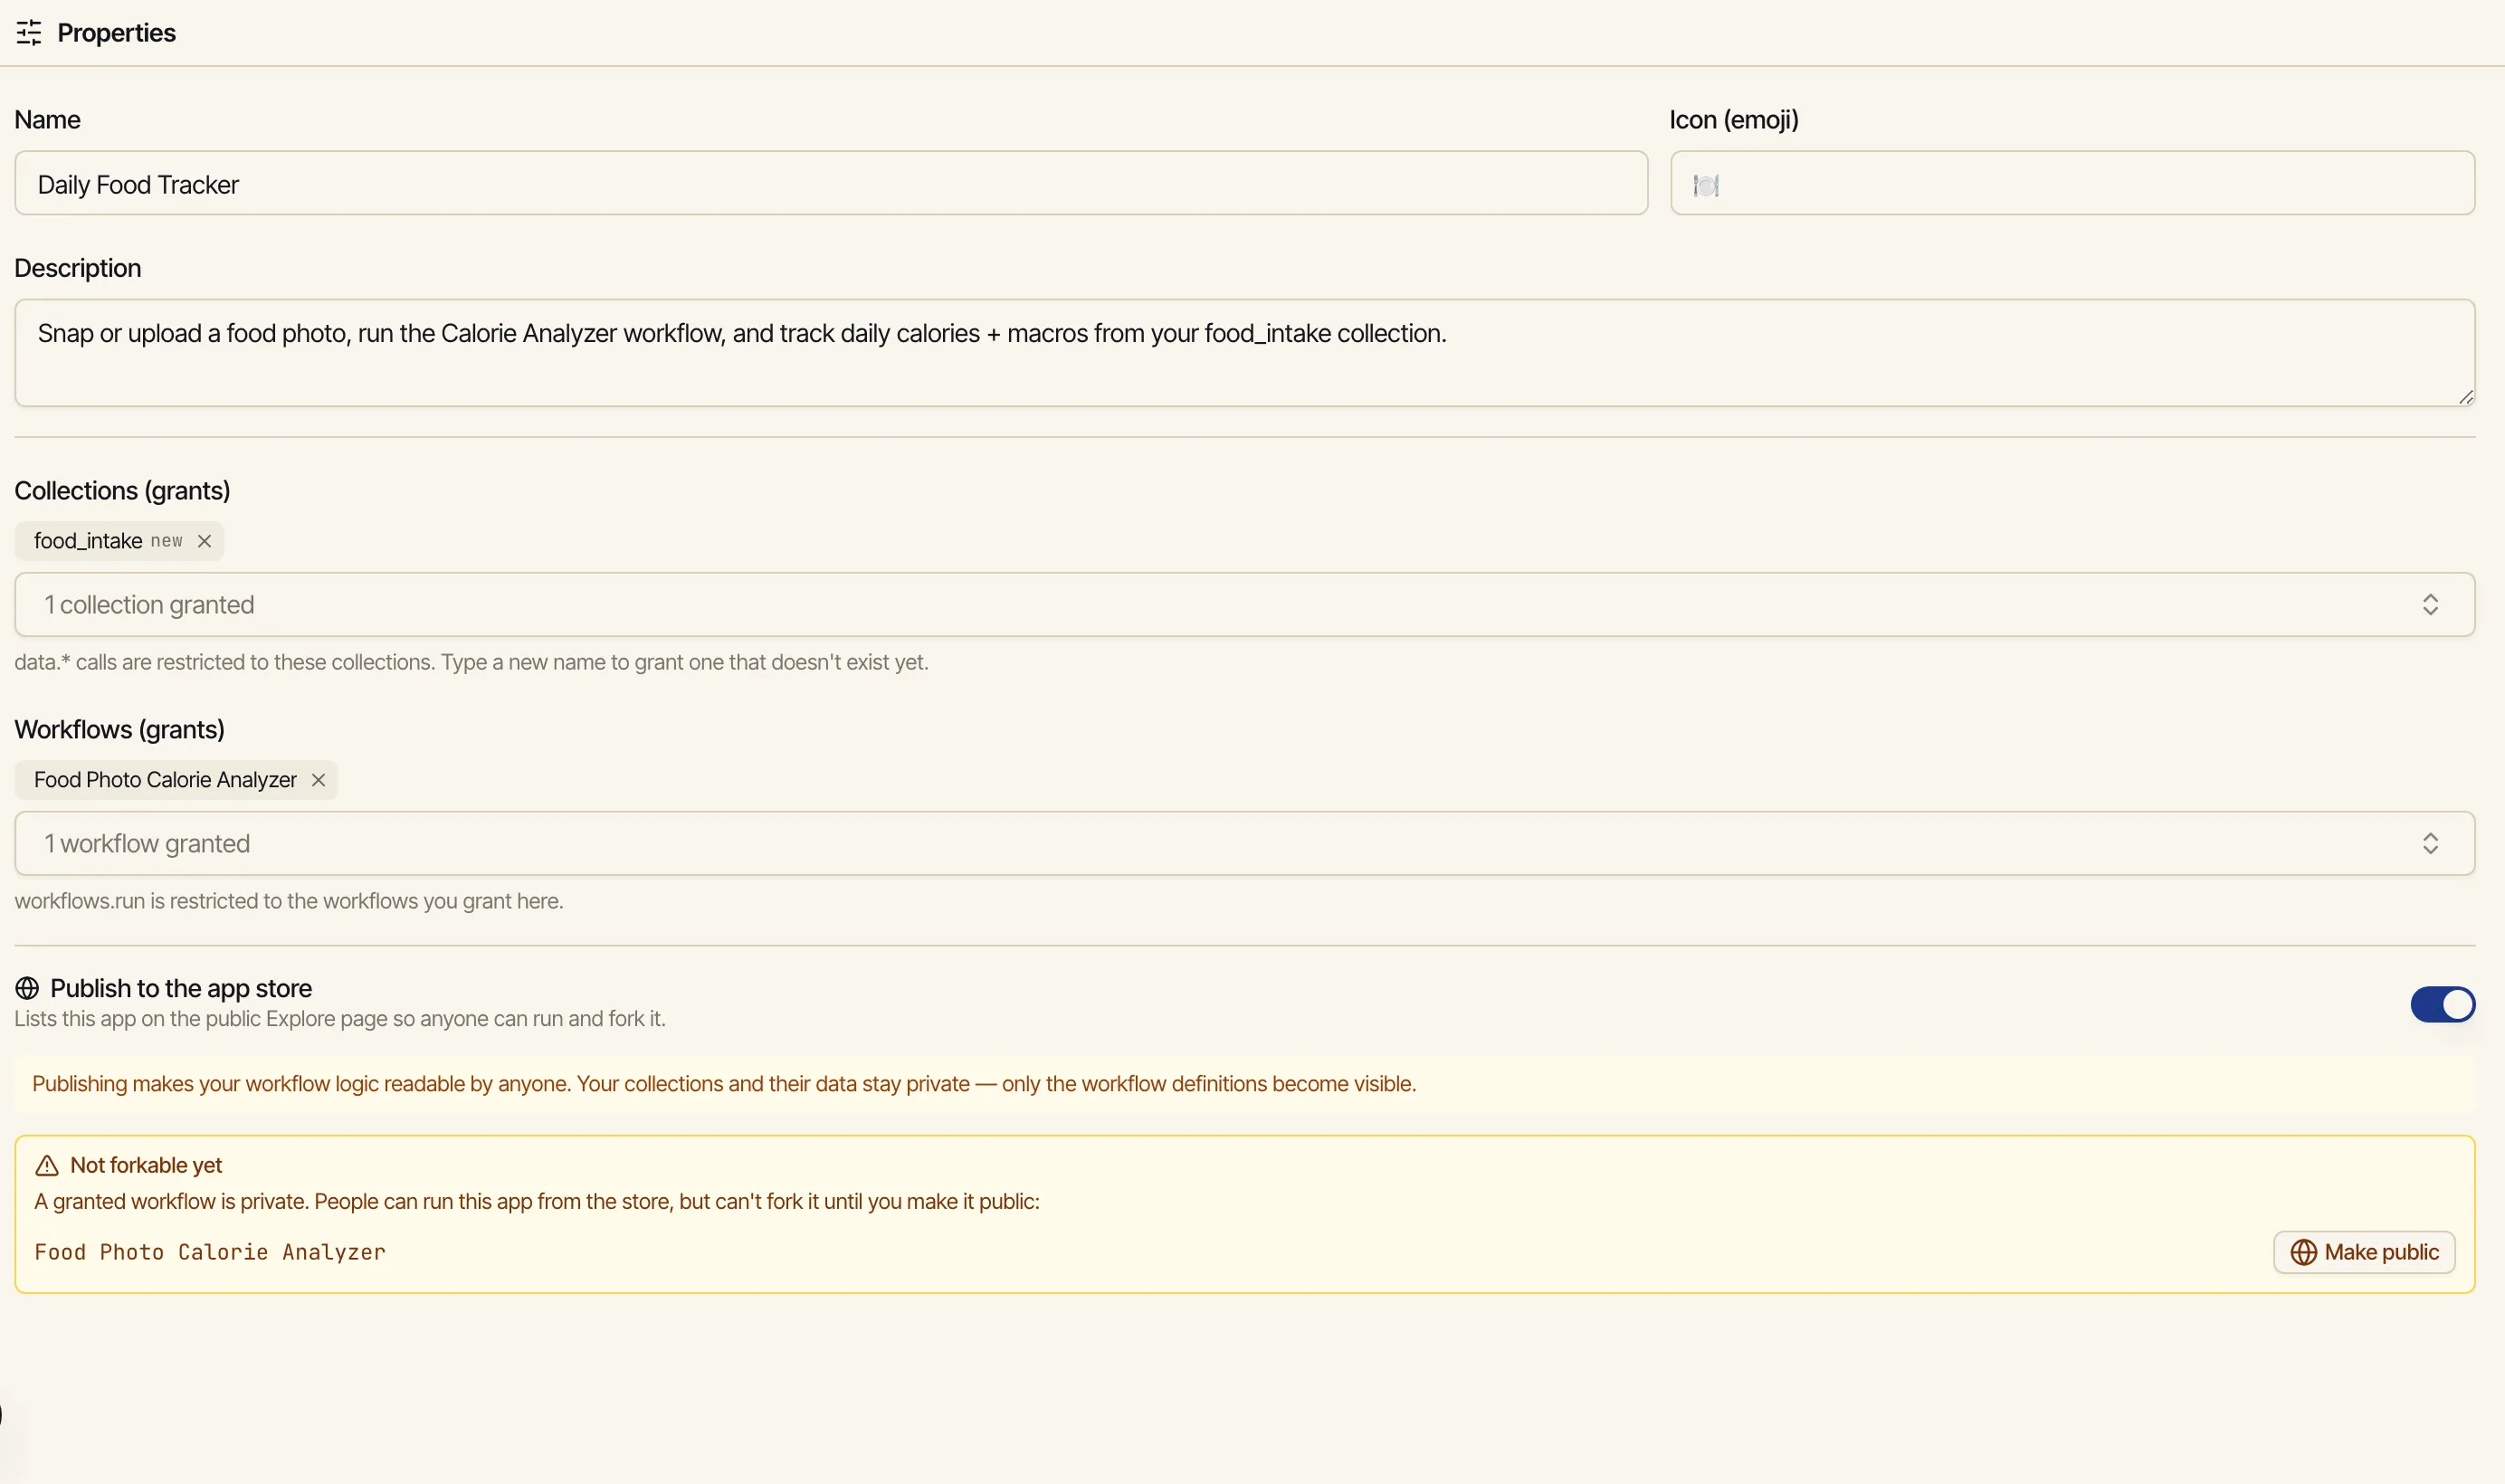
Read what publishing exposes. As soon as the toggle is on, the panel reminds you:
Publishing makes your workflow logic readable by anyone. Your collections and their data stay private — only the workflow definitions become visible.
In other words: people can read how a granted workflow works once you publish, but they never see what’s in your collections. Your data stays yours.
Make granted workflows public so the app is forkable. For someone to fork your app, every workflow it grants has to be public too. If one is still private, the panel shows a Not forkable yet notice listing each private workflow with a Make public action right there — click it to flip that workflow public without leaving the editor.
Once it’s published, your app shows up on Explore — the public app store — for anyone to find.

How a visitor experiences it depends on what your app uses:
Browse with no account
Explore is public — anyone can browse the store and open an app’s page without signing in. They see what it is before deciding to use it.
Pure-JS apps just run
An app with no workflow or collection grants — pure interface and logic — runs anonymously, right there, for a signed-out visitor. Nothing to set up.
Apps that use your work need a fork
An app that runs workflows or reads collections can’t run on your account for a stranger. It shows a Fork this app to run it gate, with the app dimmed behind it.
Forking makes it theirs
Forking deep-clones the granted workflows into the visitor’s own account and lets them pick their own models — so they run it on their stuff, never on yours.
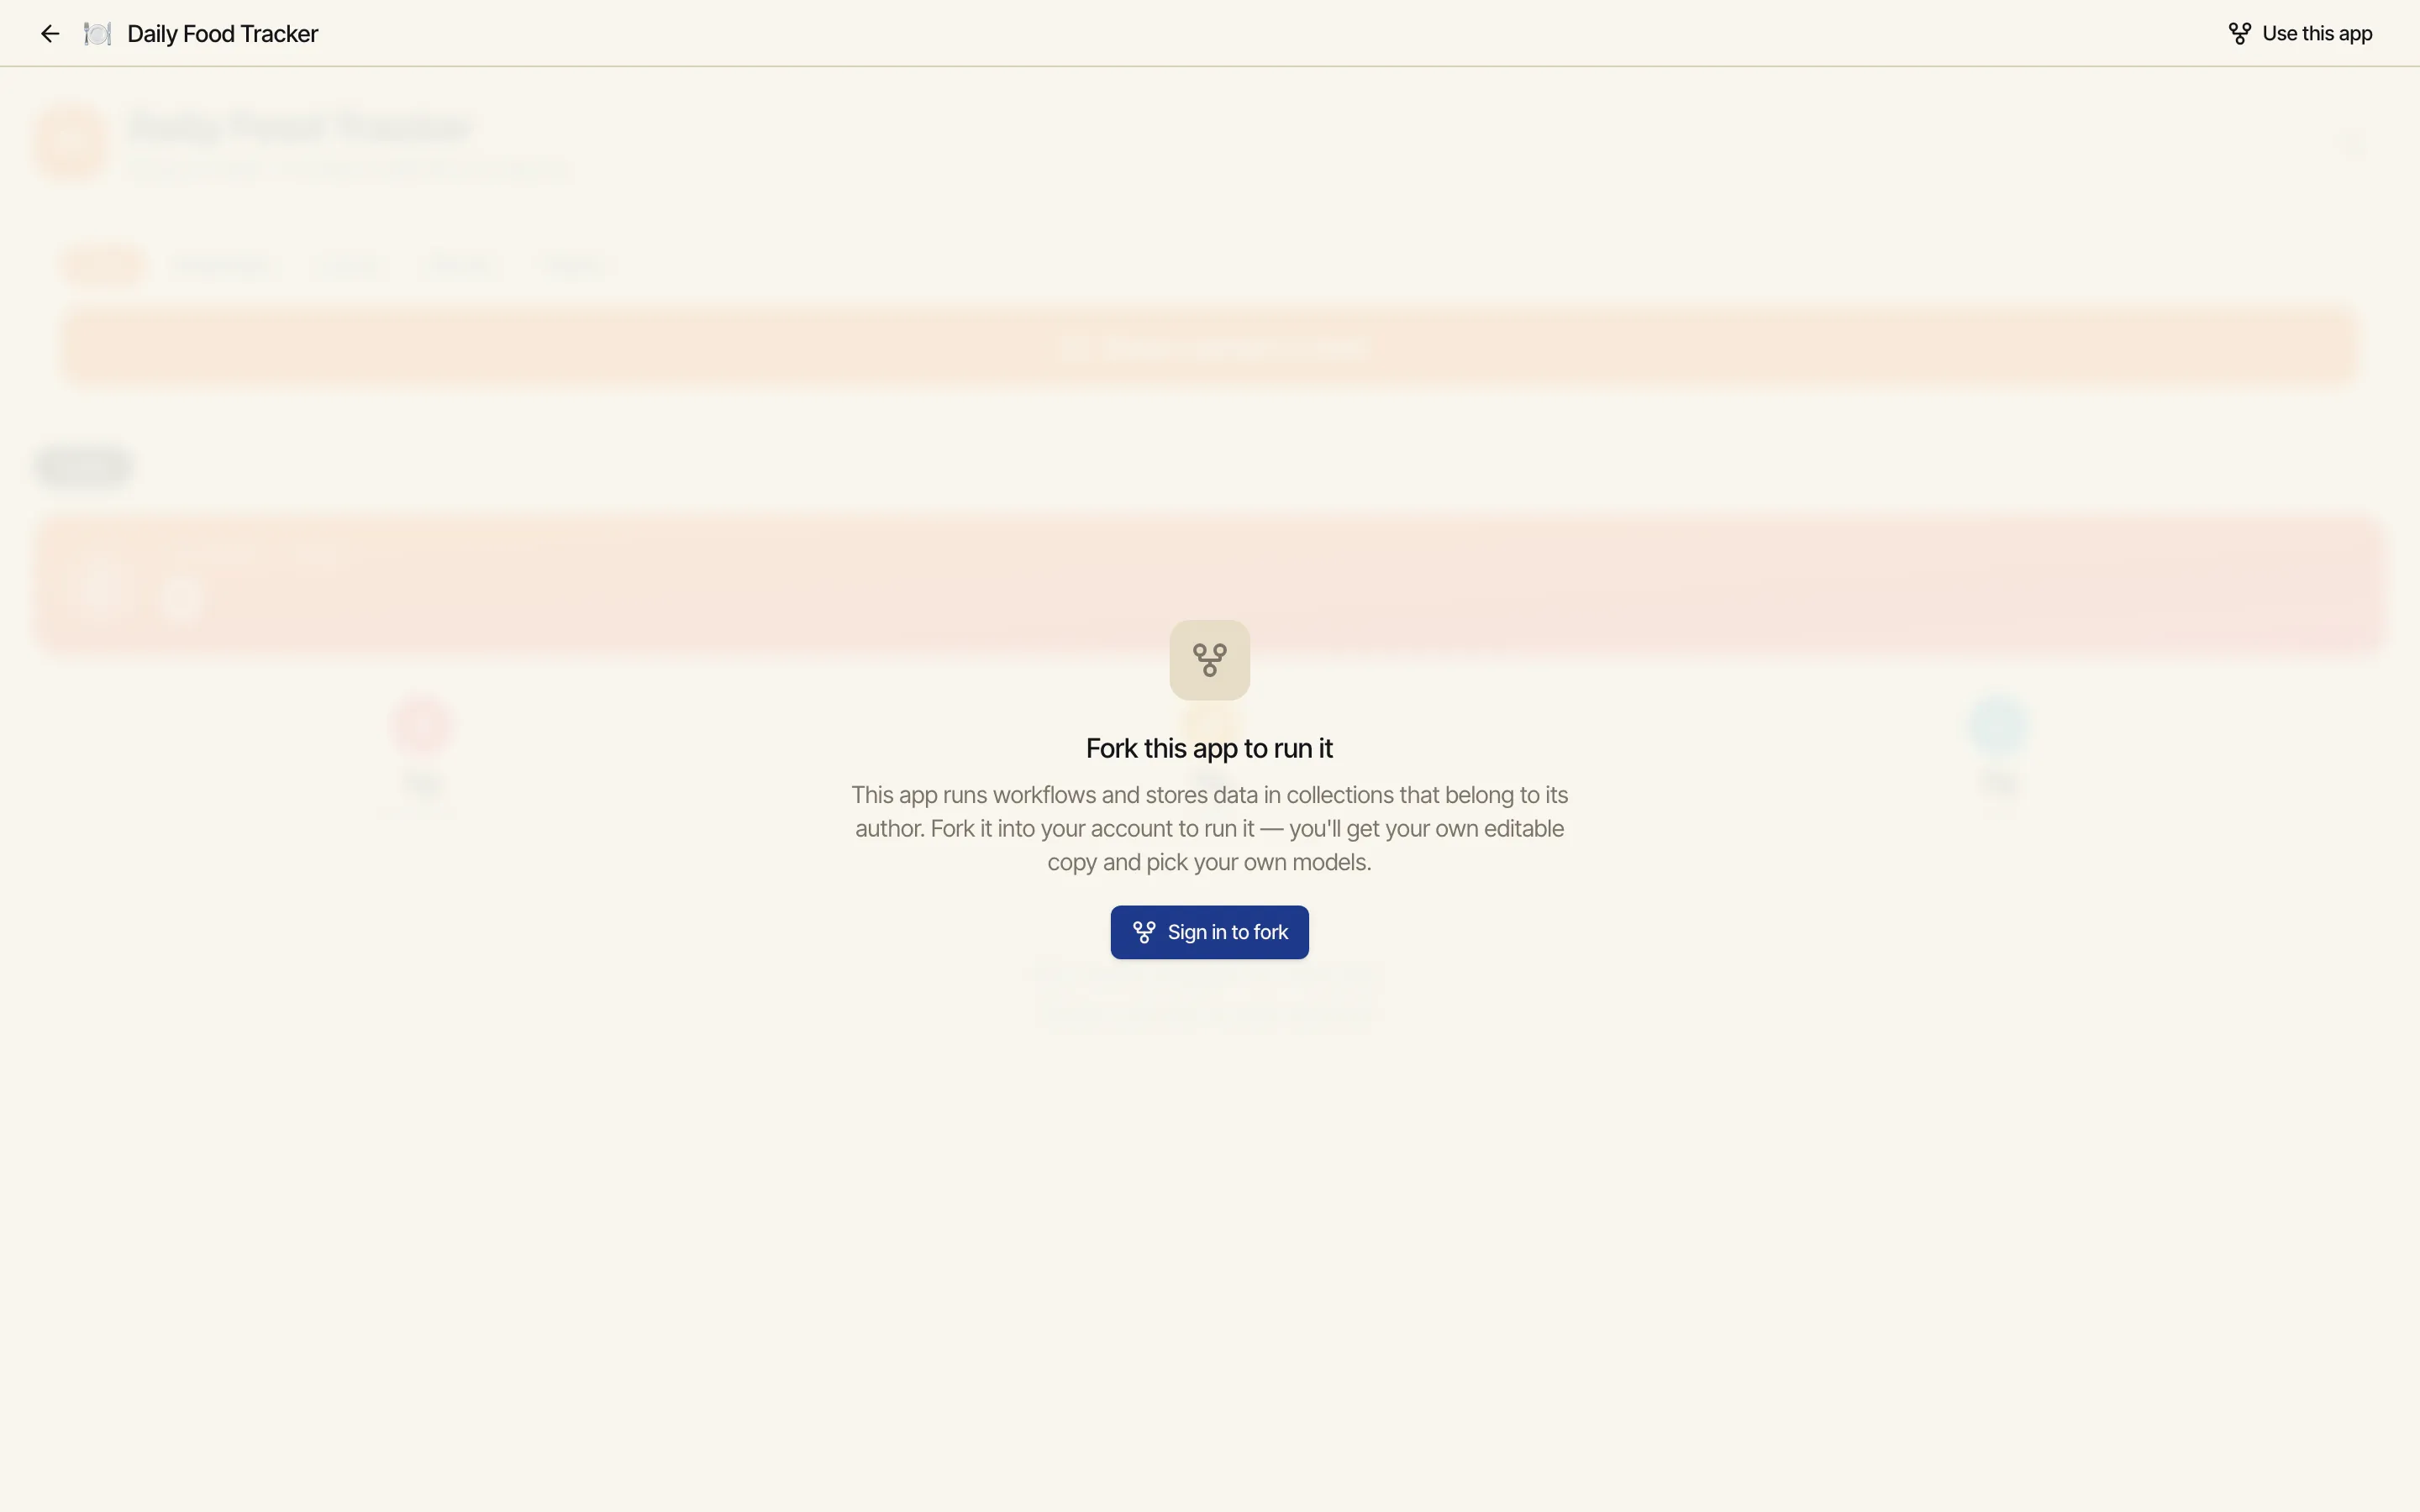
That gate is why publishing is safe to do. A visitor can read what the app does, but to actually run anything that touches workflows or data they have to fork it first — at which point they get their own editable copy, running on their own models and their own (empty) collections. Your data and your credentials never enter the picture.
A fork is a snapshot of the original at the moment you copied it — it doesn’t track the author after that. But when the author publishes a new version, your fork can pull it in.
If you own a fork and the author has published something newer than the version your fork holds, an amber banner appears at the top of the app: “The original app was updated since you forked it.” with View original, an Update button, and a dismiss (×). The banner only shows for the owner of the fork — not for other people viewing your app — and it keys off the author’s published store version, so their unpublished draft edits don’t trigger it.
Click Update. Catalyst pulls the author’s latest published version into your fork in place — it keeps the app’s URL and identity, re-clones the author’s latest workflows, and replaces the app’s code and look.
Confirm if you’ve made changes. If you haven’t edited your fork, the update applies immediately. If you have, Catalyst asks first — “Discard your changes and update?” — because pulling the update replaces your version and discards your edits.
Pick a model if you need to. Because re-cloning makes fresh workflow copies, if the author’s latest version uses a model you can’t access, the Finish setup panel reappears so you can choose your own — the same panel you met when you first forked. See Data & permissions.